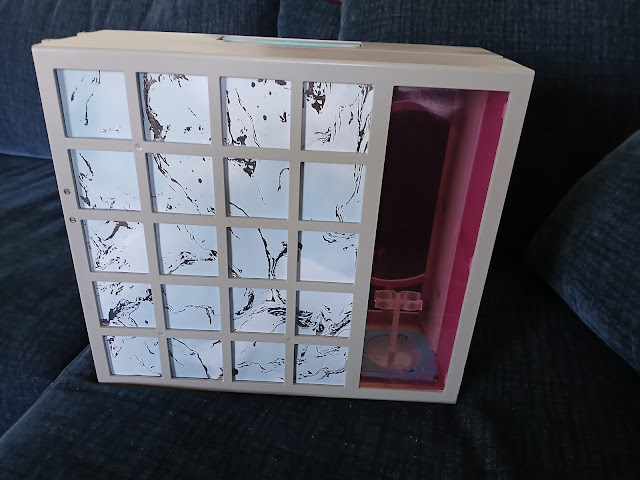
I couldn't pass up this Goodwill find. It made me immediately think, What a perfect store starter! However, after looking it over and having a poll on Instagram, it seems more people wanted to see what kind of an upgraded closet I could come up with. So... I have all these little Mini Brands set aside to recreate a store in 1/6 scale when I find another one. I even have a Re-Ment set my husband got me on clearance recently. International section, perhaps?? But back to my closet. Let's see what we can create with this!
The original is Barbiecore to the core! I'm not a fan of Barbie colors. I prefer something a little more realistic. First steps I took were to paint the outsides with a paint+primer blend. This adheres well to the plastic and was how I did things with the Jurassic Park jeep makeover.
I taped off what would be a window. I know it is pink, but I have no choice. I want something that resembles a window or glass door. Maybe one day I will get to swap that part out. For now, it stays and won't be covered with paint. Front and back were painted with the grey I had on hand. Don't worry about the cardboard inserts. I have a plan for changing those later. So here is the front. That marbled design is from a card stock page meant for scrap-booking. But I think it adds a pretty outside look. This was glued to a thin cardboard piece. On the other side of that cardboard is where I put my inside paper. This was printed and gives off that calm, almost Japanese-styled look I was wanting. In order to get this to work, I did have to pry the white shelving units out. That was no easy task, by the way! And yes, the seams make it a little less how I envisioned. But for now, I'm going to roll with it. So this is where it is was at after adding the new background pieces. One side was painted a darker grey. I ended up having to buy more paint and could only find a different shade. Then I salvaged the mirror from the original cardboard background, but decided it needed a nice frame before I added it to the new background. Using cut popcicle sticks, I painted them white before adding a green glow-in-the-dark paint. Then I framed the mirror. After digging into my bits and bobs drawers, I found some wooden pieces that were included as spares to a Steampunk clock I had received a while back. After arranging, painting and gluing in, I think they add to the Japanese style. What do you think? As an added bonus, I like having it glow in the dark. Kinda like a portal. I made the hair dryer from a broken headphone piece and some craft foam. Then I used a broken off piece from jewelry to make a hanging hook for it. Now Barbie can do her hair at the counter. But enough reading! Let me show you, in my video, the rest of what I did. Well, there you have it! Barbie has a new dream closet that actually works well for storing things. What do you think? Is there something else you'd have added? Leave me a comment below and let me know! Another project is on the way.

.jpg)


